Seamless Solutions: Maximizing Ease of Use and Installation for Diaper Pail Refills
- Share
- Issue Time
- Oct 18,2025
Summary
Navigating the world of diaper pails and their refills can be daunting for new parents. This guide delves into the various types of diaper pail refill systems, focusing on their ease of use and installation. From continuous bags to pre-bagged cartridges and standard trash bag compatibility, we explore the pros and cons, share step-by-step installation instructions, and provide tips to ensure a fresh, hassle-free nursery experience.
Seamless Solutions: Maximizing Ease of Use and Installation for Diaper Pail Refills
Parenting comes with its unique set of challenges, and managing dirty diapers is certainly among them. While diaper pails are designed to contain odors and streamline disposal, their effectiveness often hinges on the ease of use and installation of their refills. A system that is simple to set up and maintain can significantly reduce stress, save time, and keep your nursery smelling fresh.
This comprehensive guide will demystify diaper pail refill systems, focusing on how different designs impact user experience during installation and daily use. We’ll cover various types of refills, provide clear installation steps, and offer practical tips to ensure you choose a system that simplifies your life, adhering to the principles of efficiency and reliability.
Understanding Diaper Pail Refill Systems
Diaper pail refill systems broadly fall into three categories, each with distinct advantages and installation processes.
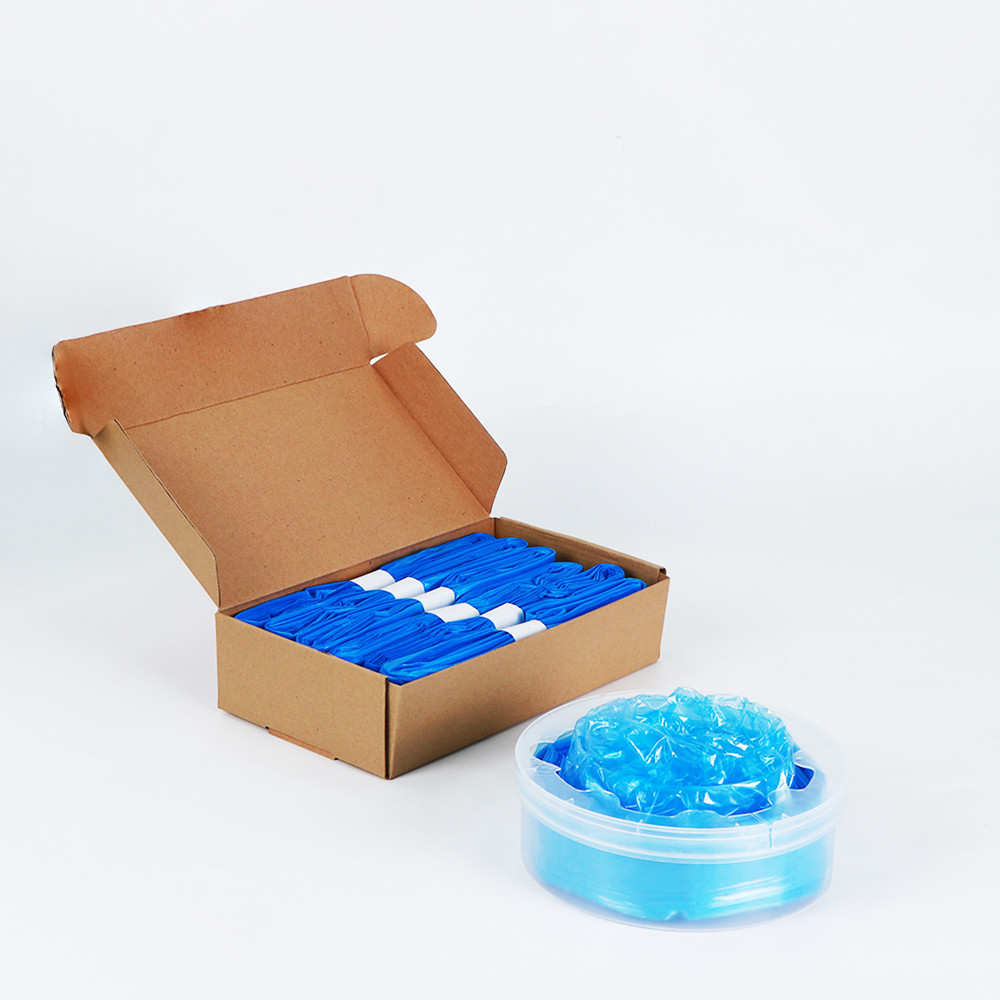
1. Continuous Bag Systems
Popularized by brands like Diaper Genie and Dekor, these systems use a long, continuous tube of multi-layered plastic film. Users pull out a segment, tie one end, fill it with diapers, and then cut and tie the other end when full.
Pros:
- Minimize waste: You cut the bag to the exact size needed, reducing plastic usage for smaller loads.
- High capacity: A single roll can hold a large number of diapers.
- Strong odor control: Multi-layer film and integrated sealing mechanisms are common.
Cons:
- Requires tying knots: Both at the beginning and end of use.
- Can be messy: Cutting and tying might expose users to odors.
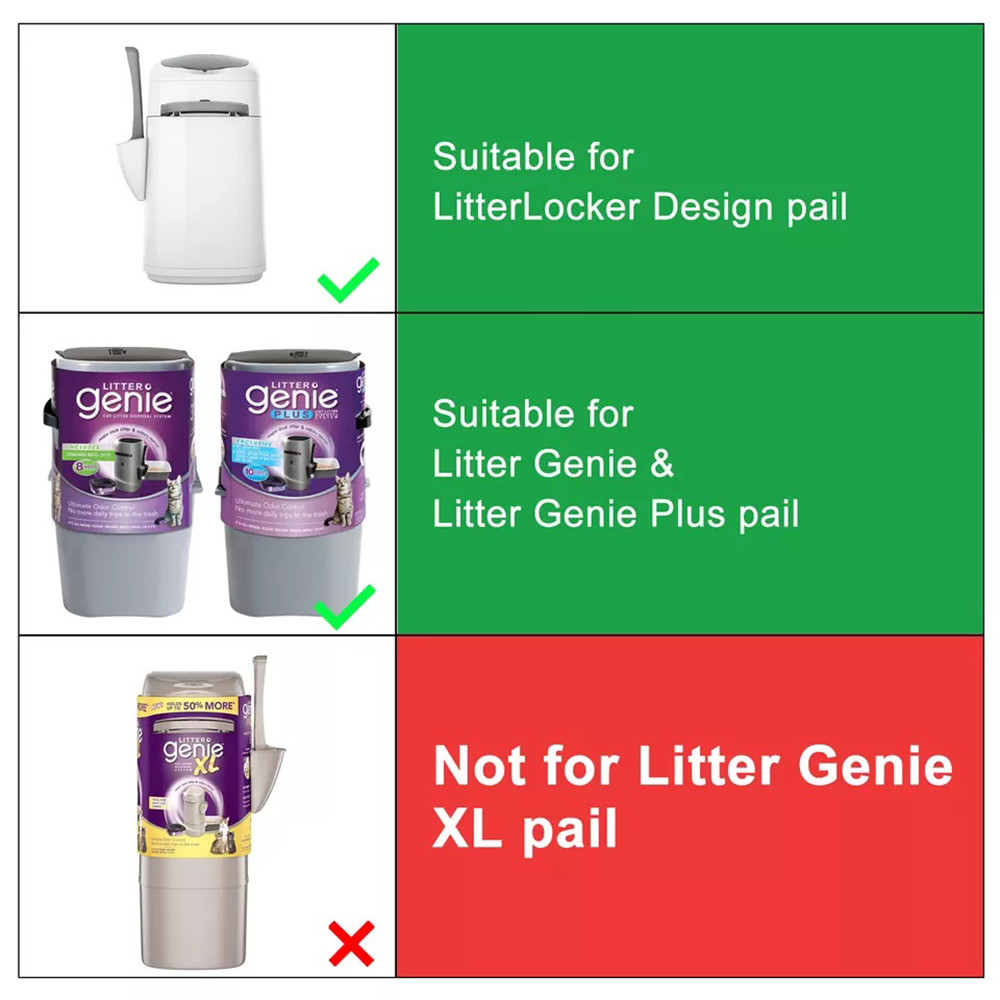
- Specific pail compatibility: Typically only work with their brand’s pails.
2. Pre-Bagged Cartridges (Snap & Toss)
Some systems, like the Munchkin Snap, Seal & Toss, utilize pre-formed bags contained within a cartridge. Once full, the bag is sealed and removed, and a new cartridge is inserted.
Pros:
- Extremely convenient: No cutting or tying, just snap, seal, and dispose.
- Hygienic: Minimizes contact with soiled diapers.
- Compact storage: Cartridges are often small.
Cons:
- पोटेंशियली more wasteful: Each bag is pre-sized, potentially leading to unused bag space.
- Higher cost per diaper: Due to the convenience and pre-packaging.
- Limited compatibility: Designed for specific pail models.
3. Standard Trash Bag Compatibility
Pails like the Ubbi steel diaper pail are designed to accommodate regular household trash bags, offering maximum flexibility.
Pros:
- Cost-effective: Uses readily available and cheaper standard trash bags.
- Versatile: No need to purchase specialized refills.
- Often made of steel: Steel is less porous than plastic, improving odor resistance over time.
Cons:
- Reduced odor control: Standard bags lack the multi-layer technology or self-sealing features of specialized refills.
- Less hands-free: May require manual bag placement and tying inside the pail.
- Can be messier: Bag removal might be less contained.
Key Factors for Ease of Use
Beyond the refill type, several design elements contribute to the overall user-friendliness of a diaper pail system.
Hands-Free Operation
Many premium diaper pails feature foot pedals or push-button lids, allowing for hands-free disposal – a significant advantage when holding a baby or a soiled diaper.
Refill Loading Simplicity
An ideal system should allow for quick and intuitive loading of new refills, minimizing frustration during frequent changes. This often involves easily accessible compartments and clear visual guides.
Bag Tying and Disposal Ease
How easily you can tie off a full bag and remove it from the pail without mess or struggle is crucial. Continuous systems require tying, while pre-bagged ones may have self-sealing mechanisms.
Capacity and Frequency of Changes
A pail with higher capacity means fewer bag changes, translating to greater convenience for parents. Consider newborn vs. toddler diaper sizes when evaluating capacity.
Visibility and Indicators
Some refills include markers (e.g., a black line) to indicate when the refill is nearing its end, preventing unexpected empty situations.
Installation Guides for Common Refill Types
Installing a Continuous Bag Refill (e.g., Diaper Genie, Dekor)
- Open the Diaper Pail: Access the refill compartment, typically by opening the lid or a side door.
- Remove Empty Cartridge: Discard the old refill cartridge.
- Prepare New Refill: Take a new continuous bag refill. Locate the start of the bag (often indicated by a tab or loose end). Pull out about 18 inches of the bag.
- Tie a Knot: Tie a tight knot at one end of the pulled-out bag segment to form the bottom of your first liner. An overhand knot is usually sufficient.
- Insert Refill: Place the cartridge into its designated slot in the pail.
- Push Bag Down: Guide the knotted end of the bag down into the main compartment of the pail until it reaches the bottom, ensuring enough slack.
- Close Pail: Securely close the refill compartment and the pail lid.
Installing a Pre-Bagged Cartridge Refill (e.g., Munchkin STEP Snap & Toss)
- Open the Diaper Pail: Open the pail and usually an inner lid to access the cartridge slot.
- Remove Used Cartridge: Discard the completely used cartridge.
- Insert New Cartridge: Drop the new, pre-bagged cartridge into the designated slot. It should click into place or fit snugly.
- Engage Bag/Mechanism: Depending on the design, you might need to pull a small portion of the bag through a sealing mechanism or twist it into place. Consult your pail's manual.
- Close Pail: Close the inner lid and the main pail lid.
Using Standard Trash Bags (e.g., Ubbi)
- Open Pail: Lift the top cover to expose the bag holder.
- Insert Bag: Place a standard kitchen trash bag into the pail, ensuring the edges are tucked around the bag holder.
- Secure Bag: Some pails have internal clips or a rim to secure the bag. Tie a knot at the bottom if using a drawstring bag for extra security.
- Close Pail: Close the top cover, ensuring it snaps into place.
Troubleshooting Common Installation Issues
Even with easy designs, issues can arise. Here are some common problems and solutions:
- Bag Not Dispensing/Tangled: This often happens with continuous systems if the bag is pulled incorrectly or an entire refill is inadvertently tugged out. If the entire bag comes out, carefully scrunch it back into the cartridge and re-insert, ensuring the leading edge is free.
- Difficulty Sealing: Ensure the refill cartridge is properly seated and the bag is not obstructing any sealing mechanisms. Check for jammed diapers preventing the trap door from closing.
- Odor Leakage After Refill: Double-check that the bag is properly knotted (for continuous systems) or that the cartridge is fully engaged in its sealing mechanism. Ensure the pail lid is closed completely.
- Pail Not Closing: If the pail is overfilled, it can prevent proper closing and compromise odor control. Empty more frequently.
Odor Control: A Partner to Ease of Use
While not directly an installation factor, effective odor control significantly enhances the perceived ease of use. A pail that locks away smells reduces the urgency of frequent emptying and makes the overall experience more pleasant. Look for multi-layered bags, activated carbon filters, and robust sealing mechanisms.
Cost vs. Convenience: Finding Your Balance
The choice between proprietary refills and standard bags often comes down to a trade-off between ongoing cost and ultimate convenience. While pails using standard bags are cheaper in the long run, dedicated refills often offer superior odor control and a more streamlined disposal process immediately.
Overview of Diaper Pail Refill Systems
| Feature | Continuous Bag System | Pre-Bagged Cartridge System | Standard Trash Bag Compatible Pail |
|---|---|---|---|
| Examples | Diaper Genie, Dekor | Munchkin Snap & Toss | Ubbi Steel |
| Installation Ease | Moderate (tying required) | Very Easy (drop-in) | Easy (lining a trash can) |
| Disposal Ease | Good (cut & tie) | Excellent (snap & remove) | Good (remove & tie standard bag) |
| Odor Control | Excellent (multi-layer, sealing) | Excellent (sealed bags) | Moderate (depends on bag quality) |
| Cost | Moderate (per-diaper) | Higher (per-diaper) | Lower (per-diaper) |
| Waste | Less (cut-to-size) | More (pre-sized bags) | Varies (standard bags) |
| Compatibility | Brand-specific | Brand-specific | Universal |
Tips for Maximizing Refill Efficiency and Ease
- Read the Manual: Always start by consulting your specific diaper pail's instruction manual for precise installation steps.
- Choose Wisely: Consider your priorities: is hands-free operation and ultimate odor control worth the cost of proprietary refills, or is cost-effectiveness and versatility more important?
- Don't Overfill: Regularly empty your diaper pail before it's completely stuffed. Overfilling can make bag removal harder and strain the pail's mechanisms.
- Stock Up: Keep a supply of refills on hand to avoid running out unexpectedly.
- Consider Odor Boosters: For extra odor control, carbon filters or baking soda pucks can be used with compatible pails.
Visual Guide: Typical Diaper Pail Refill Installation
While specific steps vary, here's a general visual representation of how a continuous refill is loaded:
(Image placeholder for a visual guide on refill installation)
Conclusion
Choosing the right diaper pail refills and mastering their installation is a small yet significant step towards a more manageable and pleasant parenting experience. By understanding the different systems, their nuances in ease of use and installation, and employing practical tips, you can ensure your nursery remains a fresh and functional space. A little upfront knowledge goes a long way in transforming a daily chore into a seamless routine.